Welcome to Scrappin Outloud

Thanks for dropping by! Take a look around and stay awhile. See that little purple box on your left, it contains a summary of recent posts, further down, you will see a box of shared items, these are things I find around the web and want to share with you. Further down on the left you can add a link to your own blog for others to see. I love comments, so feel free to leave some love and thanks for stopping by.

Sunday, August 2, 2009

During August and September, Stampin’ Up!® is celebrating kids, and we’ve got two great deals for the young and the young at heart.

From August 1 to 31, spend $35 on stamp sets from the Growing Up section of the new 2009-2010 Idea Book and Catalogue (pages 74-90) and choose a FREE package of Designer Buttons - $10.95 Value. You can choose from Playground, Sherbet and Button Latte.


From August 1–September 30 only, get the exclusive Décor Elements™ Growth Chart — plus, receive a free applicator tool! The growth chart is $33.95


One of my favorite things as a kid was to watch my growth as my grandfather marked it on the wall in his basement. Now you can do the same with your child, watch how fast they grow and how proud they are of their growth!

Happy Stamping!

Inkscape Tutorial

Penny Duncan created this fantastic inkscape tutorial, using a virtual cricut mat. Check it out!

Saturday, August 1, 2009

Children on a bike SVG

Amanda K is one of my favorite Cricut designers, she really comes up with some fantastic files! She created this one most recently, isnt it adorable?

Autum Harvest Class


Feel the cheerful warmth of the bold and rich new In Colors while you have a
great time creating this beautiful gift set. Then pass on the cheer when you
share the gifts with a friend, hostess or coworker to add heartfelt warmth to
their home or office.

Products Used:

Stamps
• None

Paper
• Dusty Durango
• Razzleberry Lemonade Designer Series Paper

Ink
• Rich Razzleberry
• Dusty Durango

Accessories Included:
• Autumn Harvest Rub-ons
• On Board Chipboard Book Basics-Small
• Rich Razzleberry Polka-Dot Ribbon
• Medium Envelops-Whisper White


Accessories Not included:
• Sanding Blocks
• Sticky Strip
• Horizontal Slot Punch
• Mason Jar – 1 quart
• Pillar Candle – 3”
• Stamping Sponges
• Tearing Edge (optional)
• 3/16” Corner Rounder Punch
• SNAIL

The cost of this class is $20.00 (plus S&H), which includes the rub-ons and papers and ribbons
needed to complete all 4 projects.

As a second option, you can order the Autumn Harvest stamp set for $23.95 and the
Autumn Harvest Rub-ons for $10.95 and receive the class and materials for FREE!
Total Cost $34.90 (Plus S&H)


Autumn Harvest Class


Country Living Summer Cookout Kit on Sale Now!

We are excited to announce that beginning today, August 1, the Country Living Summer Cookout Kit is being offered at a 40 percent discount--making it just $14.95! And with plenty of summer left to celebrate, it's a great time to take advantage of this huge discount. The Summer Cookout Refill is also still available at its regular price of $9.95.

Dates: June 15 - August 31, 2009 or while supplies last

Promotion Details

Take advantage of all the Summer Fun the Country Living Summer Cookout Kit can bring to your business. This summer, we've partnered with Country Living magazine to create a unique craft kit, which they will feature in their July 2009 issue. Our goal in furthering our relationship with Country Living is to gain greater exposure for Stampin' Up! and help you find new customers. But this kit isn't just great for business--your customers will love how it can help them create special memories with a fun and convenient, coordinated summer barbeque!

Item #

Description

Price

118070

Country Living Summer Cookout Kit $24.95
119193 Country Living Summer Cookout Refill $9.95

The exclusive Country Living Summer Cookout Kit includes the following products:

  • 8 die-cut table tents (2 each of 4 colors)
  • Die-cut components, bamboo skewers, and envelopes to create 8 shish kabob invitations
  • 12 die-cut coasters (3 each of 4 colors)
  • 16 die-cut tags (4 each of 4 colors)
  • 24 12" x 12" printed food wrapper sheets (12 each of 2 colors)
  • 4 printed recipe cards
  • 5 yards linen thread
  • Ruby Red Classic Stampin' Spot
  • Night of Navy Classic Stampin' Spot
  • Dig In stamp set (item number 116700)

The refill includes the same items listed above, minus the Dig In stamp set and Stampin' Spots. It's the perfect solution for holding multiple cookouts or one big cookout.

Note: the kit does not include tablecloths, plates, or flatware.

2 Growing Up Promotions Start Today


Promotion #1 Designer Buttons Offer:

Dates: August 1-31, 2009

Spend $35 on stamp sets from the Growing Up section of the 2009-2010 Idea Book & Catalog (pages 74-90) and receive a FREE package of Designer buttons--a $7.95 value! Eligible buttons are listed below.

Item # Page Description Retail Value
116313 181

Playground Designer buttons

$7.95
116312 181

Sherbet Designer buttons

$7.95
114333 181

Button Latte Designer buttons

$7.95


Promotion #2 Growth Chart Special Offer

Growth chart Dates: August 1 - September 30, 2009

Promotion Details:
Purchase the brand-new Décor Elements Growth Chart, only available August 1-September 30, and as an added bonus, receive a free applicator tool with your purchase (a $1.95 value).

Item # Description Price
117519

Décor Elements Growth Chart

$24.95

Wednesday, July 29, 2009


As soon as I saw this stamp set in the new catty, I knew that I had to have it! Once I got it, I struggled with cards worthy of the blog hop, so I played all weekend with them. I wanted to showcase each herb at least once, so here is what I came up with.

The first card is Lavender which stands for devotion. I used an oval punch, scalloped oval punch and the modern label punch, I also used a scalloped border punch on the bottom. I totally love the Razzelberry Lemonade DSP and the Rich Razzelberry paper and polka dotted ribbon.


The herbs came with the names on the stamps and their meaning, but when I started to stamp, I didnt like the sayings on the cards for some reason, so, I cut them off and mounted them separately!


The second card uses Rosemary which symbolizes remembrance, I struggled with this one for a little while and then decided En Francais was the perfect touchfor the back ground. The sentiment is from teeny tiny wishes and the color is Rich Razzelberry, one of the new in Colors, isnt it gorgeous?


I haven't been able to get enough of purple and green together lately. Basil (blessings) is actually one of my favorite herbs, I love the smell of it. I know I colored all of my herbs purple, but I was having too much fun with the razzleberry! I also love the distressed look, with the torn papers, it adds to the natural look of the card, dont ya think?

Finally, my last card is Thyme for happiness, more torn kraft paper with purples and greens, I just cant get enough of these colors together!


Now, if you made it this far, I hope you will sign up to get my newsletter or subsribe to my blog by email and come back later this week for a super-fabulous blog candy give away. I will wait until all the super give-aways for the blog hop are over, so be sure to come back next week! I am getting ready to move into a new house, and I am cleaning out my scrapbook stuff, this is sure to be a great giveaway!

Tuesday, July 28, 2009

Zen and embracing Life

“There is nothing either good or bad,but thinking makes it so.”

- William Shakespeare, “Hamlet”

Adapted from a Post written by Leo Babauta.

One of the greatest sources of unhappiness, is the difficulty we have in accepting things as they are.

Without judgment, without wishing for otherwise.

When we see something we don’t like, we wish it could be different —

The root of the unhappiness, according to Buddhists, is Desire. Desire to have things different, desire for something we dont have, desire for something the way it was.....

This means accepting it as the way the world works — as the way things actually are. And try to understand why that is, and embrace it. As it is. Embrace Life, as it is!

This can be applied to whatever you do: whether it be how other people act at work, how your mate acts or reacts to situations, the way the weather is, politics or the way your dinner turned out.

Accept these things as they are, and try to understand why they’re that way.

It’ll save you a lot of grief, because you’ll no longer say, “Oh, I wish things were better"

Does it mean you can never change things? Not at all. But change things not because you can’t accept things as they are, but because you enjoy the process of change, of learning and growing.

Can we make this world a better place? Again, that’s assuming that it’s a bad place right now. But instead, you could say the world is just what it is — and that’s neither good nor bad. You can say that you’ll continue to try to do things to help others, to grow as a person, to make a difference in this world — not because you’re such a bad person now, or the world sucks, but because that’s the path you choose to take, because you enjoy that path.

As you catch yourself judging, and wishing for different — and we all do it — try a different approach: accept, and understand. It might lead to some interesting results.


“Be Content with what you have; rejoice in the way things are. When you realize there is nothing lacking, the whole world belongs to you.” - Lao Tzu


I thought the embrace life set was perfect for this concept. Accept things the way they are, embrace them as they are right now at this very moment....


The first card uses Ruby Red, Pretty in Pink, Regal Rose and Dusty Durango. I embossed the plants first, used the brayer to color the card and stamped the sentiment with staz on, last.

The second card, I stamped and embossed the flowers in the background, I used my brayer and Rich Razzleberry (dont you love that color?) on top of the embossed flowers, stamped in clear embossing ink. I then stamped and embossed the flower outlines, sponged on the color, added some white ink and some crystal effects, added the pearl after cutting them out and adhering them to the card. I used the Scallop Oval sizzix die to add something to the center (as much as I love razzelberry, it was too much), I water colored the scalloped part of the oval with razzelberry and glued the flowers to the frame. I also distressed teh oval a little bit. Eh, I am not really happy with how it came out, its not the look I was going for, but, It is what it is, I embrace it ;)


Want a good laugh?

If you haven't read my other blog yet, and you want a good laugh, be sure to check it out.... My kids always do something to make me laugh!~http://angi-mylifewiththreeboys.blogspot.com

Watering Can SVG

Cathy from Cathy's corner created this fantastic file and allows free sharing, click on the can to download and be sure to check out Cathy's corner for more great files!

Unmounting your Stampin Up Wheels


dsc00156.JPG

I found this post on one of my favorite blogs today. Michelle Zindorf is the best brayer artist I have ever seen.

If you have ever seen her work, she has a style that is undeniably hers and is easily recognizable!
Michelle is extremely generous with sharing her work and tutorials and travels the country to do brayer workshops that sell out across the country.

Michelle doesnt like to use the wheels (kind of funny since she uses the brayer all the time, they kind of do the same thing, he he) So, she unmounts them and uses acrylic blocks to use them as regular stamps.... Hmm, what a concept that is, dont ya think?

Here is how it is done. First, take an Exacto Knife and cut right through the seam of the stamp when it is on the wheel. Next peel the stamp off of the wheel. (they come off very easily, accordint to Michelle) If there is glue stuck to the back of the stamp, peel it off. Michellle reports that she just rolled the glue off with her finger.

dsc00159.JPG

Next, she took a permanent marker “Sharpie” and wrote the name on the back of the stamp.

Next, she applied a thin coat of Aleene’s Tack it Over & Over Glue on the back of the stamp with a small paint brush, right over the name she wrote on. The glue dries clear so you can still see the name.

Let this glue dry for about 1 hour, at least. The Glue stays tacky so your stamps will now stick to an acrylic block (I use a 4.5″ x 7″ block) and you can take them on and off. You will not have to apply this tacky glue to the stamp again until you have used this stamp about 50 times.

dsc00160.JPG

dsc00162.JPG

She stores them in a large zip lock baggie. They stick right to the inside of the bag. You can clearly see the name of the stamp through the baggie. She also puts a reference sheet in the bag with them and a reference sheet in her stamp binder.

dsc00163.JPG

If you unmount a bunch at one time you can stamp a few at one time on plain paper to make your reference sheets.

dsc00165.JPG

this is photo of her Current Stampin’ Up Stamp binder. This binder holds a reference sheet for all of her Stampin’ Up stamps. When she gets a new set of Stampin’ Up stamps I copy the sticker sheet before I assemble my stamps to the blocks and the copy gets put in my binder. Takes very little time. The binder is so nice to have to flip through to see what she has. :) (this is a great idea that I have seen several demos use. Since I didnt start out that way, I took the old catalog and tore out the pages to put inside the lid of the stamp sets to easily see what stamps go in what case, you could just as easily put another sheet in a binder for easy reference of all your stamps without having to dig through them all!

dsc00168.JPG

I hope you have found this tool time tip helpful. I certainly have! I am not sure yet, if I will unmount my wheels....... but I am thinking about it, it really is a good idea if you dont like the wheels. Also, if you dont have a stamp a ma jig, it probably makes it a lot easier to keep a straight line with these long images, rather than wheeling a crooked image....

Thanks Michelle for sharing this awesome idea!

Here is a link to all of Michelle's Tool Time posts: http://zindorf.blogs.splitcoaststampers.com/category/tools/

Finding Happiness in nature

I have started exploring a new way of looking at the world and thinking (or not thinking)
I am exploring Buddhism and I find it fascinating! Many people think Buddhism
is a religion, when in fact, it is simply a way of life, a different way of seeing things
finding that all things have a beginning and an end.

I am learning to just be still and feel the moment at hand. Memories of the past
do not serve me in this moment, right here. Worries of the future also do not
have any impact on this part of my life, right here, today, right, now.

One of my favorite lessons so far: To the catterpillar it is the end, to the butterfly, it is just the beggining.

It really shows us that the death of something brings about the life of something else and if we just be still and let the world unfold, life will be so much easier.

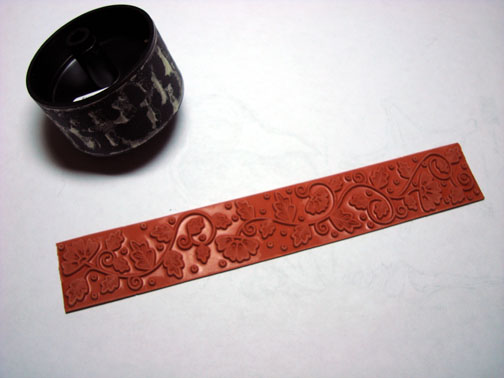
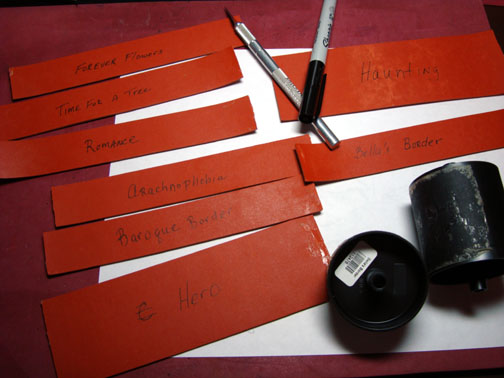
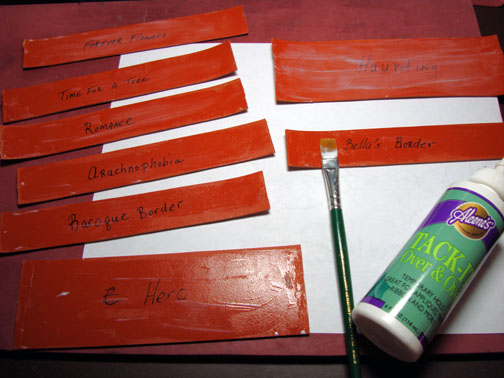
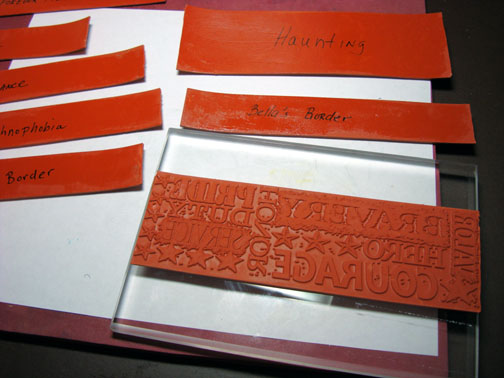
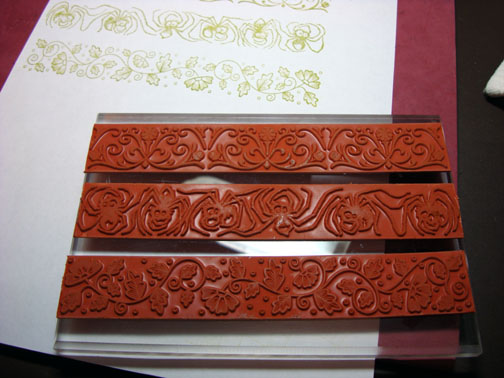
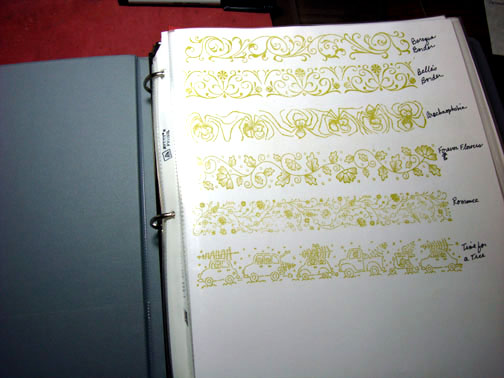
So, I have been on a lil butterfly kick lately and I am trying to use up my retired DSP. The stamps are from the Simple Friendship set and happen to be some of my favorites at this junction in life.

As my life changes so much recently, it is hard not to concentrate on the end of things. My relationship recently ended, I am moving and I am changing positionsat work. Its a lot of change...... Buddha teaches us that the death that occurs in
the fall, is the mulch that makes way for the beauty of spring. Again, the death
of the flowers and leaves on the trees and the frozen earth make way for the new life that Spring brings to us.

Every year, dont you feel as though Spring comes and there is a new day. The frozen, hazy days of winter turn into warmth and renewed beauty. I chose Spring Song to signify, that not only are certain phases of my life ending, but these changes are fertilizing and making way for something new and beautiful.

I didnt write down where I got the sentiment from and I just cant seem to remember where it came from, but, I just thought it was appropriate....

When life gets tough..... Just take a deep breath...... and its all good.

While Studying the life of Buddha, I have been reading a lot of Eastern history and learning how Buddhism found its way to China and Japan from India and transformed into the Zen movement many associate with Buddhism, which is actually one school of Buddhism thought..... As I was contemplating the Eastern Influence on Buddhism and thinking of the fresh renewal of spring, I thought the set Eastern Influence would be appropriate. This card is for no occassion in particular, but I thought of the Buddhist thinking of compassion and the sadness that comes from the death of something, be it a relationship, a good day, a life, the day, the night, a star, a tree, a flower..... With Sympathy from Teeny Tiny Wishes seemed appropriate.

Happy Stamping!
Posted by Picasa

Monday, July 27, 2009

Stampin’ Up Deal of the Week!

What a great deal! You save $5 on this cool punch! Call or email me today to order yours!

Sunday, July 26, 2009

Another Free SVG from Free SVGs

As usual, Free SVGs has done it again, with this super baseball cut file. be sure to check out all their other sports files for purchase!

Hodgepodge Hardware and Stampin' Up! Punches

I've been receiving questions about which Stampin' Up! punches fit the Hodgepodge Hardware. So here's a display a fellow demo made up last year for customers showing which punches work with which label holder (Shown is is the Styled Silver. PLEASE NOTE: The Styled Vanilla is on sale. Same shapes and sizes, different finish as shown here)

Here it shows the Designer Label , 1" Circle & Small Oval punches:

Styled-Silver-HPH

One week only (ending July 26th!) - Styled Vanilla Hodgepodge Hardware #112454. Regular price $29.95, now ONlY $18.99. THAT'S 36% off . Purchase online at: http://angi.stampinup.net


TODAY IS THE LAST DAY TO GRAB THIS GREAT SPECIAL!

Saturday, July 25, 2009

Eastern Influence and Simple Friendship


I have always loved the eastern influences set and I finally purchased it!
I really love the way this card came out. I am usually not a fan of orange, but I really do enjoy this one, with the Kaleidoscope Designer Series Paper

Stamp: Eastern Influence
Paper: Kaleidoscope
Cardstock: Dusty Durango, Very Vanilla
Colors: Copics, Distress Ink


Of course, I had to make one on the other side, so I had to get a little used to the orange colors. This time, I used Dusty Durango and Tangerine Tango, more butterflies, just trying to think of setting loved ones free.....

Stamps: True Friend, Hard to say
DSP: Kaleidoscope
Cardstock: Very Vanilla, Dusty Durango
Colors: Dusty Durango, Tangerine tango


Have you tried the water colored roses yet? I just cant stop making these, they look so beautiful, dont they?

Stamps: Fifth Avenue Floral, True Friend, Kind and Caring Thoughts
DSP: Cottage Wall
Colors: Rich Razzelberry
Misc: Designer label punch, aqua painter, embossing powder
Cardstock: Very Vanilla, Rich Razzelberry

I only used Rich Razzelberry on the roses, I just colored some petals darker than others to give it some dimension.

Finally, I used more of the Eastern Influence flowers to add some decor to this great phrase from teh Hard to Say Set!

Stamps: Eastern Influence, Hard to say
DSP: Cottage Wall
Card Stock: Rich Razzelberry
Misc: Sizzix Oval Frame
Ink: Rich Razzelberry
Posted by Picasa
Blog Candy, Blog Candy, and more Blog Candy. Over 50% of the blogs on this tour are offering Blog Candy. Check the Princess list on launch day. Every name with an asterisk next to it is offering blog candy.

That's not all! The Royal Blog Tour Home Page is offering their own Blog Candy. And it is -- a Big Shot Die Cut Machine!!!!

You'll have to work a bit for it as there are 20 clues that will be scattered among the 80 blogs. But won't it be worth it if you come away with a brand new Big Shot?

This drawing is open to all countries represented by Princesses in this tour, including Canada and Australia!

Good luck to you and enjoy the ride! Remember to start on the Royal Blog homepage.

Free Lipstick cut file

Here is the latest freebie from free SVG files!
Blog Candy, Blog Candy, and more Blog Candy. Over 50% of the blogs on this tour are offering Blog Candy. Check the Princess list on launch day. Every name with an asterisk next to it is offering blog candy.

That's not all! The Royal Blog Tour Home Page is offering their own Blog Candy. And it is -- a Big Shot Die Cut Machine!!!!

You'll have to work a bit for it as there are 20 clues that will be scattered among the 80 blogs. But won't it be worth it if you come away with a brand new Big Shot?

This drawing is open to all countries represented by Princesses in this tour, including Canada and Australia!

Good luck to you and enjoy the ride! Remember to start on the Royal Blog homepage.

GO TO THE ROYAL BLOG TOUR HOME PAGE ON SUNDAY, JULY 26TH TO START THE ROYAL BLOG TOUR AND ENTER FOR A CHANCE TO WIN A BIG SHOT DIE CUT MACHINE! The Ro


The Royal Blog Tour is three days long, and you'll be happy it is! There are four tours - a total of 80 fabulous blogs!
But wait - there's more!
Blog Candy, Blog Candy, and more Blog Candy. Over 50% of the blogs on this tour are offering Blog Candy.
Check the Princess list on launch day. Every name with an asterisk next to it is offering
blog candy.
That's not all! The Royal Blog Tour Home Page is offering their own Blog Candy. And it is -- a Big Shot Die Cut Machine!!!! Honestly - you don't want to miss this tour!
This drawing is open to all countries represented by Princesses in this tour, including Canada and Australia!
Cricut Top 40