Welcome to Scrappin Outloud

Thanks for dropping by! Take a look around and stay awhile. See that little purple box on your left, it contains a summary of recent posts, further down, you will see a box of shared items, these are things I find around the web and want to share with you. Further down on the left you can add a link to your own blog for others to see. I love comments, so feel free to leave some love and thanks for stopping by.

Saturday, September 12, 2009

Today's Featured Project


For recipe or purchase information, just click on the project!

Christmas Punch Give Away


I am really surprised at the turnout on day one of my blog candy and the lack of response on day 2....... Interesting how many people turn out for blog candy advertisements and dont actually come back after subscribing....... So, you should increase your odds, by checking out all the days of the giveaway and leaving comments... Today is Day 4 of the giveaway............ Be sure to go back to see the other days!


Day One
Day Two
Day Three


In the meantime here are a few more samples of cards made with the Christmas Punch set that I am giving away next weekend.....


This first card was inspired by SCS: Vera, I used Christmas Punch of course, Real Red, Whisper White and Garden Green. I also used a 1 1/4" square punch, the Curly label punch and the scalloped square....


Another card inspired by SCS; This one uses Christmas Cocoa DSP, the Scalloped Oval sizzix die the boho blossoms punch fits perfectly on the snow flakes.... Old Olive and Real Red colors make this card complete..
I used the salted background technique on this one, another good one inspired by SCS: Krischie... this is the first time I played with this technique and I loved it, I am going to have to play with it some more. Anyway, I used Bashful Blue, Night of Navy and Barely Blue on glossy white paper backed by Night of Navy.. I am so loving the white Taffeta Ribbon and I dangled the snow man using some Blue grosgrain.
Posted by Picasa
Finally, I used some Garden Green and Real red with some Sleigh Bells Ribbon and Christmas Punch. This one, also inspired by another stamper: BKeenan


Today's task is simple, just comment on any of my posts this week, you get one entry for each individual post commented on.... only one per post.

Free SVG: Flourish

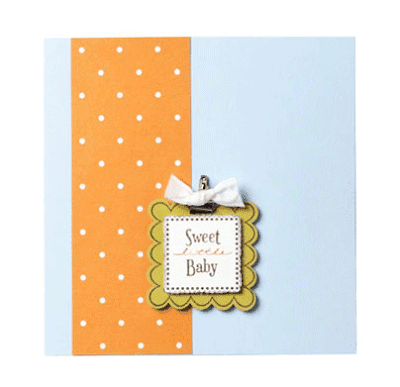
Wanda has really out done herself with this intricate design, isnt it just lovely?

How To Condition Your Stamps

The Operators at one of my favorite sites, Stamping 411, came up with this fabulous tutorial to show you how to condition your stamps. The reason you want to condition your stamp is to get rid of that Hazy look they have when they come from the factory.

This is noticeable when you ink your stamp for the first time. When you’ve transferred the image to cardstock you get an image that looks something like the one on the left of this picture:

Yep! It’s especially noticeable with SOLID image stamps like this one where there are no lines to color in after stamping. But sometimes even your LINE ART images and GREETINGS need conditioning as well to make sure you are getting the best image transfer possible. We here at Stamping 411 know that you always want your images to look great from the first time you stamp them – us too! And the image on the right of the above picture shows you what a well conditioned, well inked stamp on cardstock looks like.

Now, there are several ways to Condition your stamps. The one I use almost exclusively is to lightly sand the stamp surface with my Sanding Block. I hold the stamp in one hand like this:

Then, I rub my Sanding Block back and forth a few times in one direction:

And then I turn the stamp a half turn and sand back and forth a few times in the opposite direction.


Once this is done, I spray some Stampin’ Mist on my Stampin’ Scrub and clean the stamp like this:

making it ready to use. It’s really that easy folks!

Two other methods that stampers use are equally easy.

One is to use your Staz-On Cleaner and simply clean off the stamp, clearing away the residue. Here is an example:


You can also use a pencil eraser and rub it lightly across the stamp surface, like this example:

Whatever method you choose is really up to your personal preference, but the main thing is to “Just Do It!”

Be sure to clean your stamp before use with Stampin' Mist and the Stampin' Scrub when using either of these examples as well.

One other thing to consider when stamping with a conditioned SOLID image stamp is to make sure it has plenty of ink on it.

The way I do this is to use the “Twist and Tap” method. I first twist the stamp on the surface of the ink pad – dye or Classic inks only for this, Craft or pigment inks are different – about 3 to four times. Then I tap it a couple of times on the ink pad to evenly distribute the ink across the stamp surface. This results in a crisp, clean image almost every time.

Happy Birthday Operation Write Home!!


Operation Write Home, formerly know as Cards for Heroes is a fabulous organization that makes handmade cards for Military members to send home to their loved ones....

As of today 194,206 cards have been sent to deployed heroes! The response from the troops is great, they love sending these hand-crafted cards home.

Operation Write Home is a group of crafters from across America (and beyond!) who have a heart for our nation's armed service members. We make handmade cards and send them to deployed warriors so they can keep in touch with their loved ones at home! We serve all branches of the military in all deployed locations, including those stationed aboard ships.

The project began in 2007 with just a few cards sent by friends on a message board; eventually cardsforheroes.org started, and in September 2009, we became Operation Write Home - to better focus on what we're all about: helping heroes keep in touch with home!

Our crafters range in age, location, and level of skill - but all have a desire to help those who serve us. Cards are made by individuals, groups, schools, scouts, and sent to our volunteer shippers in quantities both small and large! Shipping donations of any size are appreciated - from $1 to any amount - and can be included with card donations to any shipper, or mailed separately, or via Paypal.

If you are interested in contributing, here are some dates to keep in mind.

CARD DEADLINES

Postmark by these dates:
Halloween: Sept 20
Thanksgiving:Oct 5
Christmas:Nov 1
Hannukkah:Nov 1
All other cards: anytime

Free school SVGs

Aren't these files terrific? These would be great for decorating those elementary school binders or maybe even getting started on some Holiday Gifts for Teacher....

Sam and Hailey create so many wonderful files for purchase, be sure to stop by their store and see what they have come up with!!!

Christmas Punch Blog Candy - Task 3


In this post, I wanted to show you just how versatile this stamp set is, look at all these fantastic projects I found, using this hostess set. Arent these projects inspirational? Today, to enter, just tell me which project you like best......... and what would you do with this set, if you win it?

If you missed the first two ways to enter, you can find them here:

Day One
Day Two


I found all the above samples on the internet, they are from fellow demos and SU customers.

Introducing Holiday Kits