Welcome to Scrappin Outloud

Thanks for dropping by! Take a look around and stay awhile. See that little purple box on your left, it contains a summary of recent posts, further down, you will see a box of shared items, these are things I find around the web and want to share with you. Further down on the left you can add a link to your own blog for others to see. I love comments, so feel free to leave some love and thanks for stopping by.

Wednesday, June 3, 2009

New Colors: Sneak Peak!


New Stampin' Up! In Colors

Wow.. I love the new Stampin' Up! In Colors ; Aren't these polka dot ribbons fabulous? Wanna know what else is super great this year? SU is offering markers in the IN-Colors this year! Isnt that fantastic?


Rich Razzleberry, Melon Mambo, Dusty Durango, Soft Suede, Crushed Curry & Bermuda Bay

The In Color products will be available to customers on July 1. If you don't have a demonstrator and need a new catalog, you can order yours today and I'll mail it as soon as it arrives here!

Going Going Gone!

promo

The Last Chance Lists are out!! Some of the Accessories & Decor Elements are on sale. Click on the links below to see the lists - some accessories are already sold out, so if you see something you covet, contact me today to place your order.

Last Chance Stamp Sets
Last Chance Accessories (updated daily)
Decor Elements (opens as a PDF)

Use your Stampin Up Punches

Punchy Tips of the Month by Wendy Fee

cupcake card
Do you own any Stampin' Up! punches? If so, here are some tips to help you out!!!

1. Make sure you stamp and then punch out your image. It's much easier to centre the image on your punched shape!

2. To outline an opening using a punch (see card to the right), make sure that you punch the smaller opening first!!! You can then put the paper back in your larger punch, centre the opening, and punch out the rim. I used the 1 3/8" and scallop circle punches to create this rim.

3. Does your punch ever get stuck? Try punching some waxed paper to lubricate the edges.

4. Punches that aren't cutting cleanly need to be sharpened. Try punching through some aluminum foil, or even a pop can (cut it open using Craft & Rubber scissors).

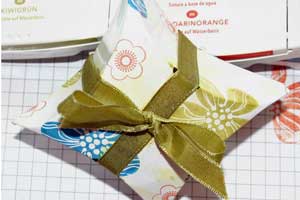
Puffy box

by Brandy Whisman

Create a lovely box by tracing a CD onto your cardstock.

Supplies

  • One piece of 8 1/2" x11" Glossy Cardstock
  • Scrap Paper big enough to trace a cd
  • Scissors
  • Sponge
  • approx. 30" of Ribbon
  • Ruler
  • Bone Folder (optional)
  • Black Marker
  • Stylus
  • CD
  • Stamps
  • Ink

Step-by-Step

  1. Step 1

    Trace cd onto scrap paper and cut out.

  2. Step 2

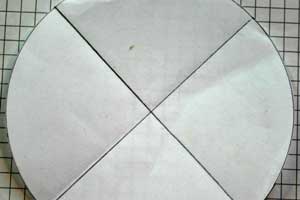
    Fold circle in half one way, then the other, dividing the circle into four equal pieces.

  3. Step 3

    Place template on CD and pull back slightly.

    Make a mark with a black marker at all four points.

    Remove the template, then use ruler to draw lines all the way across.

  4. Step 4

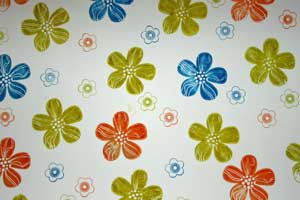
    Stamp glossy cardstock as desired, covering the whole sheet, then flip over.

  5. Step 5

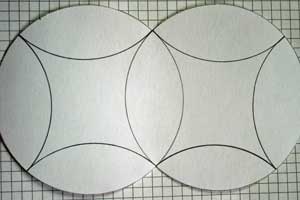
    Trace the CD, then arrange the CD so that two of the lines are lined as shown and trace again.

    You should have two circles that are intertwined at this point. If you lay this out correctly, you can get two boxes out of one sheet.

  6. Step 6

    Move the cd around each circle, lining up the two lines and tracing again.

  7. Step 7

    Cut out around just the outside circles.

    Using a stylus, trace each of the inside lines.

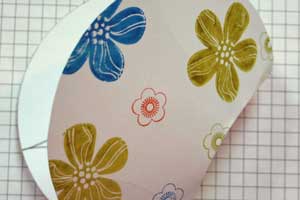
  8. Step 8

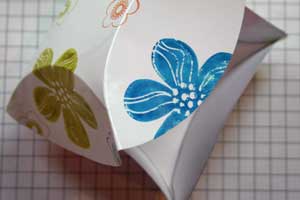
    The box should look like this at this point.

  9. Step 9

    Starting with the inside area of the box, creasing at impressed lines. A bone folder can be used at this point.

  10. Step 10 (Optional)

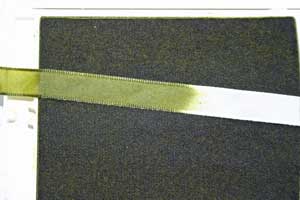
    Set empty box aside and dye some ribbon.

    Let this dry completely.

  11. Step 11

    Fill box with a small treat or surprise and tie a ribbon around it to close.

Cricut Top 40