Monika from Stamping together at Monika's place came up with a new idea over the weekend
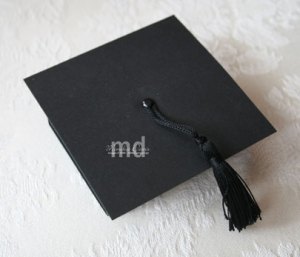
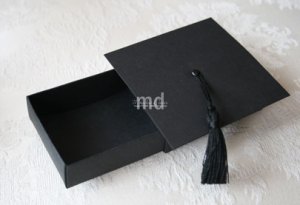
She took the new Matchbox Die and used that to create a graduation cap 
Slide a check or some cash inside the drawer part. Add a tag. This was super quick.

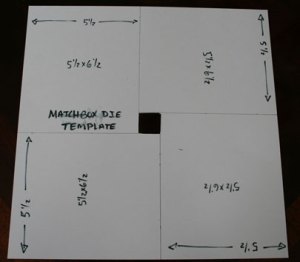
Use a piece of the cardboard backer from a package of Designer Series Paper – it is 12″ x 12″. Create a template by measuring 5-1/2″ from each side and drawing a line to the center. Once you have all four sides marked you end up with a small square in the middle – cut this out and throw it away. Now on your card stock lay down your template and trace out the small square – this will help you cut your card stock. Line up each side a 5-1/2″ and cut down to the square. Turn and repeat for all four sides – you end up with four pieces that are 5-1/2″ x 6-1/2″. Use two of these pieces on your Matchbox die to cut the base of the box and the cover plus the three tags. Here is a picture of the template:
The Matchbox Die is longer than 12″ so if you just cut a 6″ x 12″ piece to cover the whole thing – it won’t fit!
Isn't it adorable! I love al the versatility of sizzix dies, you can really do a lot with them once you add a little imagination! Don't have the new matchbox die from sizzix or Stampin Up yet? You can grab it right here! Hurry, the mini occassions catalog ends on June 30!


