I found this post on one of my favorite blogs today. Michelle Zindorf is the best brayer artist I have ever seen.
If you have ever seen her work, she has a style that is undeniably hers and is easily recognizable!Michelle is extremely generous with sharing her work and tutorials and travels the country to do brayer workshops that sell out across the country.
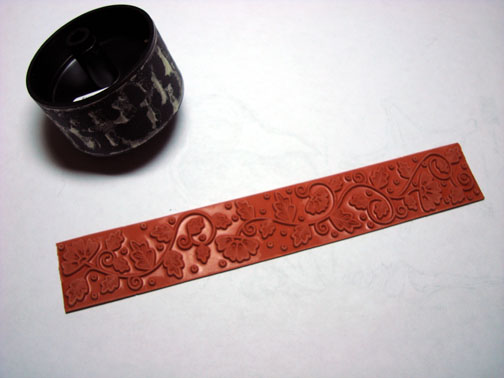
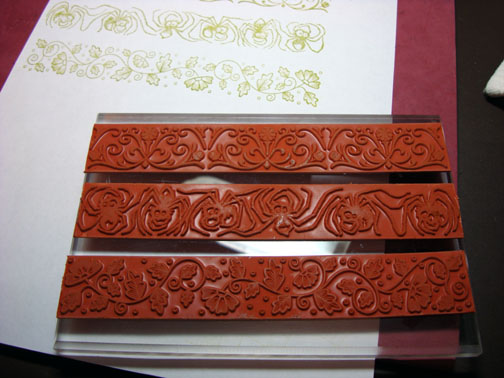
Michelle doesnt like to use the wheels (kind of funny since she uses the brayer all the time, they kind of do the same thing, he he) So, she unmounts them and uses acrylic blocks to use them as regular stamps.... Hmm, what a concept that is, dont ya think?
Here is how it is done. First, take an Exacto Knife and cut right through the seam of the stamp when it is on the wheel. Next peel the stamp off of the wheel. (they come off very easily, accordint to Michelle) If there is glue stuck to the back of the stamp, peel it off. Michellle reports that she just rolled the glue off with her finger.
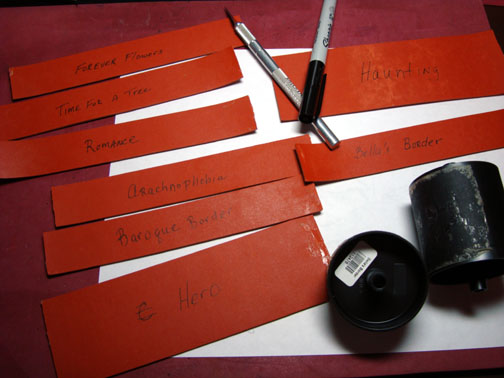
Next, she took a permanent marker “Sharpie” and wrote the name on the back of the stamp.
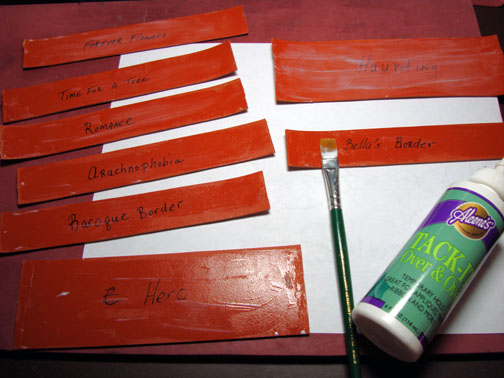
Next, she applied a thin coat of Aleene’s Tack it Over & Over Glue on the back of the stamp with a small paint brush, right over the name she wrote on. The glue dries clear so you can still see the name.
Let this glue dry for about 1 hour, at least. The Glue stays tacky so your stamps will now stick to an acrylic block (I use a 4.5″ x 7″ block) and you can take them on and off. You will not have to apply this tacky glue to the stamp again until you have used this stamp about 50 times.
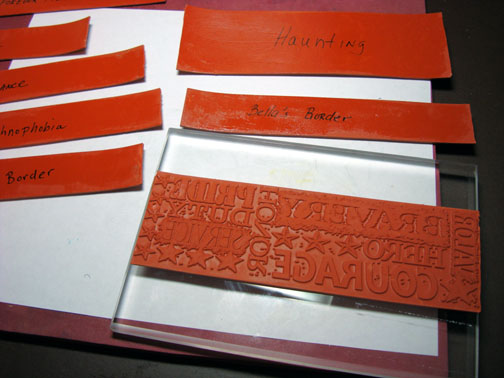
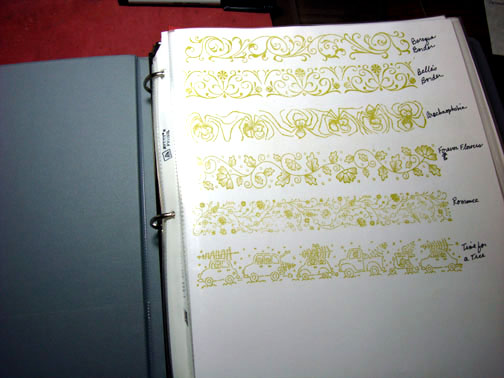
She stores them in a large zip lock baggie. They stick right to the inside of the bag. You can clearly see the name of the stamp through the baggie. She also puts a reference sheet in the bag with them and a reference sheet in her stamp binder.

If you unmount a bunch at one time you can stamp a few at one time on plain paper to make your reference sheets.
this is photo of her Current Stampin’ Up Stamp binder. This binder holds a reference sheet for all of her Stampin’ Up stamps. When she gets a new set of Stampin’ Up stamps I copy the sticker sheet before I assemble my stamps to the blocks and the copy gets put in my binder. Takes very little time. The binder is so nice to have to flip through to see what she has. ![]() (this is a great idea that I have seen several demos use. Since I didnt start out that way, I took the old catalog and tore out the pages to put inside the lid of the stamp sets to easily see what stamps go in what case, you could just as easily put another sheet in a binder for easy reference of all your stamps without having to dig through them all!
(this is a great idea that I have seen several demos use. Since I didnt start out that way, I took the old catalog and tore out the pages to put inside the lid of the stamp sets to easily see what stamps go in what case, you could just as easily put another sheet in a binder for easy reference of all your stamps without having to dig through them all!
I hope you have found this tool time tip helpful. I certainly have! I am not sure yet, if I will unmount my wheels....... but I am thinking about it, it really is a good idea if you dont like the wheels. Also, if you dont have a stamp a ma jig, it probably makes it a lot easier to keep a straight line with these long images, rather than wheeling a crooked image....
Thanks Michelle for sharing this awesome idea!
Here is a link to all of Michelle's Tool Time posts: http://zindorf.blogs.splitcoaststampers.com/category/tools/
No comments:
Post a Comment