Welcome to Scrappin Outloud
Wednesday, September 30, 2009
Tuesday, September 29, 2009
Apply tinted shimmer Paint to tiles

Monday, September 28, 2009
shimmer Paint direct to stamp with reinkers Video


Sunday, September 27, 2009
Shimmer Paint Video

Saturday, September 26, 2009
Welding with the Cricut

Today's Featured Project: Spooky Nights Card
 Are you looking for a card that's more delightful than frightful? Look no further! With adorable Halloween images--yes, Halloween can be adorable--and a classic Halloween color palette, this card is one you'll want to send to all your friends. For recipe or purchase information, just click on the project!
Friday, September 25, 2009
Today's Featured Project: Happy Haunting Card

Thursday, September 24, 2009
Today's Featured Project: Happy Halloween Card
 Our haunted graveyard is the perfect background for any of our Twick or Tweet images. Just wheel and get set to create a fun-filled scene to thrill your friends and family. Luckily, you'll be able to create lots of these cards--everyone will want one!
Wednesday, September 23, 2009
Today's Featured Project: Happy Halloween Card
 Sneak a few spooky greetings into your Halloween. This creepily cute Halloween card will be sure to thrill your friends and family. The embossed haunted house adds a totally touchable feel. For recipe or purchase information, just click on the project!
Scary Halloween Clown SVG
Tuesday, September 22, 2009
Today's Featured Project:Halloween Party Invitation
Vacation Scrapbooking Ideas Video
Speaking of Vacation, I am in Oahu, working right now... What a hardship, right! I havent forgotten about the contest and I will tell you all the winner on October 3, when I return home. Please keep the comments coming and send all your friends for more chances to win!

Monday, September 21, 2009
Today's Featured Project: Halloween Night Card
Sunday, September 20, 2009
Never ending card video Part 2

Today's Featured Project: From Our Patch to Yours Card
Saturday, September 19, 2009
Today's Featured Project
Never ending card video
embed width="448" height="361" type="application/x-shockwave-flash" wmode="transparent" src="http://s276.photobucket.com/flash/player.swf?file=http://vid276.photobucket.com/albums/kk28/imstillbigred/Part1base.flv">

Today's Free SVG File: Witches Hat

Another one from Free SVGs, as always click the hat to download and be sure to visit their site to get some more great files for a nominal fee.

Friday, September 18, 2009
Check out this site!
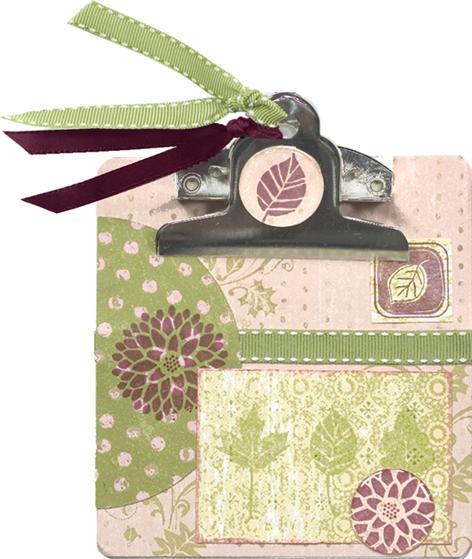
image by Spotted Canary
Have you checked out Spotted Canary yet? It’s pretty new website devoted to all sorts of crafts and they even have a great stamping section where you’ll find a forum, projects (like the clipboard pictured here), articles, videos, tips and blog posts.

Free file for your Cricut
SVG Cuts has come up with another gorgeous Freebie for you today, if you can spell, or even say for that matter Chrysanthemum, lol.
Free Vintage Clipart graphics
Recipe for today's project
Skateboard Cork Board
This cool cork board design looks like it came right from a designer t-shirt. But it cost a lot less than the shirt, will last a lot longer, and your teen will think you're the coolest mom around.
SUPPLIES REGULAR QUANTITY
Extreme Elements $26.95 Qty:1
Extreme Skateboard $8.95 Qty:1
Old Olive 8-1/2X11 Card Stock $5.50 Qty:1
Soft Suede 8-1/2" X 11" Card Stock $5.50 Qty:1
Whisper White 8-1/2X11 Card Stock $7.50 Qty:1
Not Quite Navy Classic Stampin' Pad $5.95 Qty:1
Old Olive Classic Stampin' Pad $5.95 Qty:1
Soft Suede Classic Stampin' Pad $5.95 Qty:1
Not Quite Navy Stampin' Write Marker $3.25 Qty:1
Old Olive Stampin' Write Marker $3.25 Qty:1
Stampin' Dimensionals $3.95 Qty:1
Color Spritzer Tool $12.95 Qty:1

Today's Featured Project
Thursday, September 17, 2009
Today's Featured Project: Best Witches Card
New Stamping Video, Cracked Glass

Another Autumn Freebie - Autumn SVG File

Autumn is in the air, the weather is getting crisper and Holiday Decor is starting to show up in the stores. makes me want to take a fall roadtrip and check out the leaves as they start to change....oooh that is one of my favorite times of the year!! Free SVGs has given us this great Title file, makes you wanna hop in the car, doesnt it?
Wednesday, September 16, 2009
Today's Featured Project
A Scrapbooking History Collage

Faux Shaving Cream
Create a marbled look on your stamped image.
Supplies

- Stamping Wheel
- Solid Stamp
- Dye Inks
- Neutral Cardstock
- Marker (optional)
Step-by-Step
-
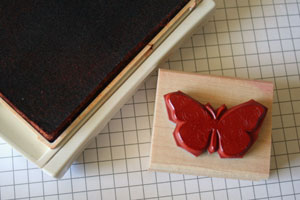
Step 1
Ink up your solid stamp with one of your classic ink colors.
-
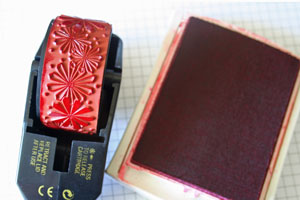
Step 2
Ink up your Stamping Wheel either with an ink cartridge or by rolling over another ink pad with a complimentary color.
-
Step 3
Place your Wheel on your solid stamp and twist it.
You can also swipe the wheel over the stamp.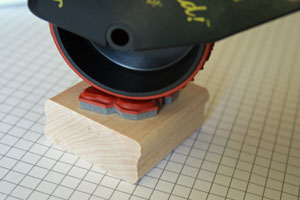
-
Continue to twist or swipe your wheel until you have transfered enough ink from your wheel to your stamp.
This will create your marbled look.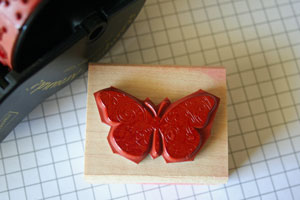
-
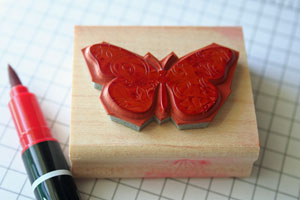
Step 4 (Optional)
Use a marker to outline your solid stamp. I used the same color that the wheel was inked up with.
-
Step 5
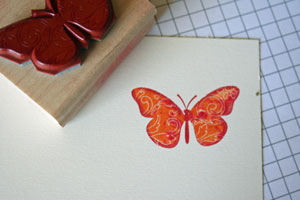
Huff on your stamp. That will remoisten the image. Now stamp your image on neutral cardstock.
-
Step 6
Finish your card.
Your Turn
You've seen the tutorial, now you try it! We've got a section of the gallery set aside for Faux Shaving Cream. Try this technique, then upload your artwork to the gallery. Show us your creations!


